CONTAINER APPS · GUIDE
Deployment pipeline: push → Staging, Promote → Production
Connect a Git repository once and every push deploys a Staging copy of your app — production is never touched by a push. You test the new build on Staging's own URL, then click Promote to take exactly that tested version live. If anything looks wrong, Roll back restores the previous version (including a database snapshot) in one click. No more “every commit redeploys production” downtime.
← All platform guidesA compose project already deployed with Deploy from Git with “Keep connected — auto-deploy on every push” enabled. That's the whole prerequisite: the pipeline card appears automatically on Platforms → Container Apps for every connected repository.
The pipeline at a glance
git push ──▶ [ STAGING ]  ──  Promote ──▶ [ PRODUCTION ]
              redeploys on           manual, takes the
              every push             tested build live
- Staging is a real, separate copy of your app with its own
<uid>.cdn.com.trtest URL — served through the CDN edge exactly like production. - Production keeps serving the old version untouched while Staging builds and deploys. It only changes when you Promote.
- Roll back is always available after a Promote — traffic/image and the pre-promote database snapshot are restored.
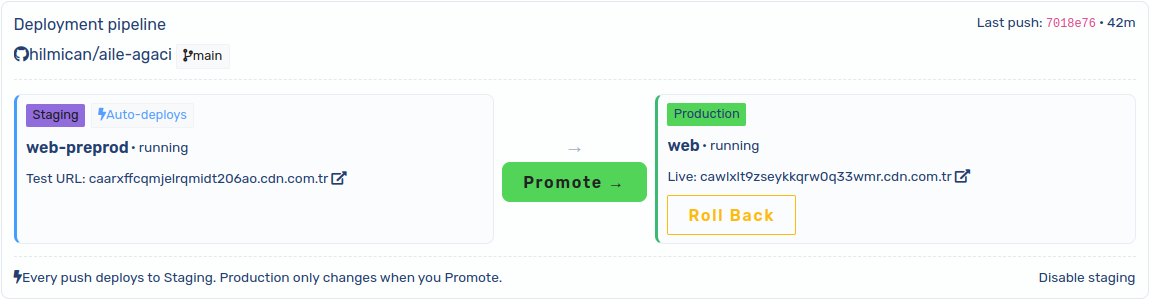
1 · Connect your repository (once)
In Platforms → Container Apps → App creation → Deploy from Git, connect GitHub (recommended — one-click GitHub App, no tokens to manage) or use a repository URL + access token, pick the repository and branch, tick “Keep connected — auto-deploy on every push to this branch”, then Build & deploy. Full details: the Deploy from Git guide.
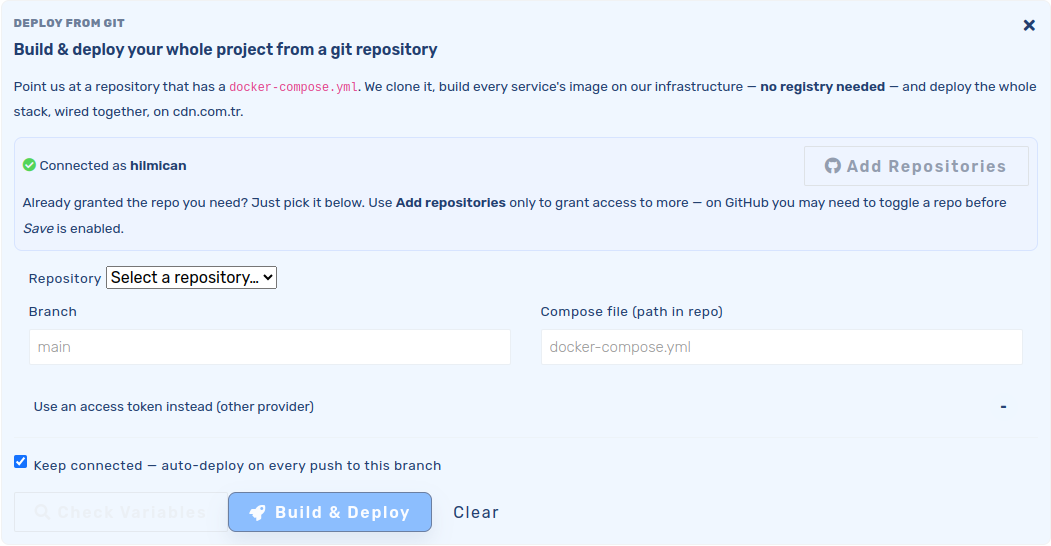
2 · Enable Staging
On the pipeline card, click Enable staging. This creates a test copy of each of the repository's apps and points auto-deploy at it — from that moment, pushes deploy Staging, never Production.
- The test copy gets its own public test URL (
<uid>.cdn.com.tr) automatically. If a copy created earlier has no URL yet, the card shows a Get test URL button. - Data sharing (under “Data sharing options”, default shared): shared — Staging uses the same database/Redis/storage as production (best for code/UI changes); cloned — Staging gets its own MySQL with a copy of the data (safe for schema changes); isolated — a clean start.
- The first open of a fresh test URL can briefly return 502 while edge/DNS activate (~a minute) — that's normal and one-time.
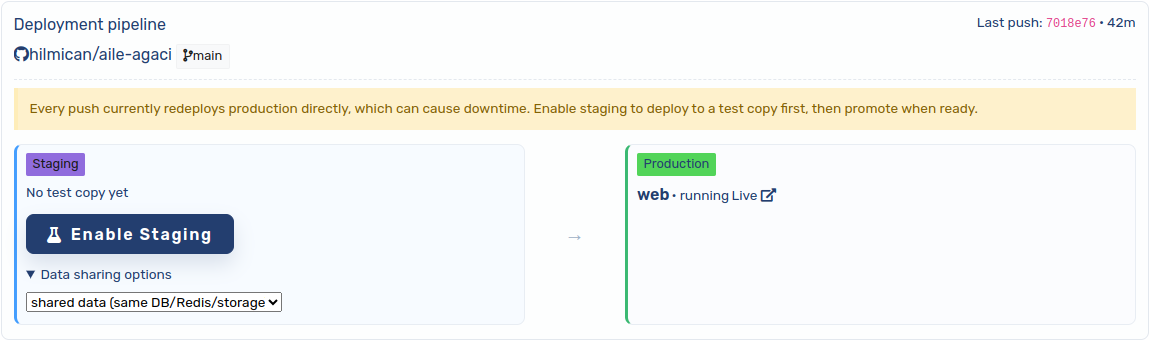
3 · Push — Staging deploys itself
- Every push to the connected branch builds the image and rolls it out to Staging. The card shows the last push (commit + time) and the Staging status live.
- Open the Test URL and verify the new build — production is still serving the previous version, completely unaffected.
- While Staging is rolling out, its status shows deploying; Promote stays disabled until the copy is running.
4 · Promote — take the tested version live
Click Promote. Production starts serving the tested version immediately — with no build and no downtime. An automatic database snapshot is taken first, so a rollback can also revert data changes. Under the hood, one of two mechanisms is used:
- Your own domain attached → an instant origin switch on the CDN edge: the production domain is attached to the staging app first, then released from the old one — a pure traffic move, seconds, no restart.
- Production on its
<uid>.cdn.com.trsubdomain → the already-built, already-tested image rolls onto the production app with a zero-gap rolling update (the old pod keeps serving until the new one is ready). URLs stay stable: the test URL is always Staging, the live URL is always Production.
Promote moves the build, not the configuration: environment variables and secrets set on Staging stay on Staging. Change production config on the production app.
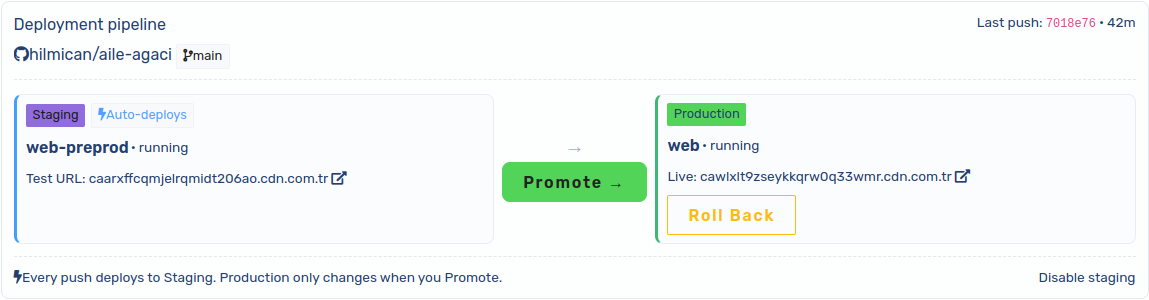
5 · Roll back (if you need to)
- After a Promote, a Roll back button appears on the Production side. One click restores the previous version — the domain switch is reversed (or the previous image is redeployed) and the pre-promote database snapshot is restored.
- Rollback is the same instant, no-rebuild operation as Promote.
Good to know
- Turning the pipeline off: “Disable staging” on the card makes pushes deploy production directly again (the old behavior — may cause downtime during deploys). The test copy is kept.
- New services: auto-deploy updates existing services; a service newly added to the compose file is not auto-added — run Deploy from Git once to add it.
- Multi-app projects: Enable staging creates a test copy for every service of the repository, and “Promote all” takes the whole set live together.
- Manual test copies: apps not connected to a repository can still use the same staging/promote mechanics from the environments panel — see the Blue/green environments guide and the case study.
- CLI: the same operations are available via cdnctl.